Witches and ghosts galore, oh my! These adorable no-bake Halloween treats are quick and easy, and utterly un-failable. You can’t NOT make them for Halloween.

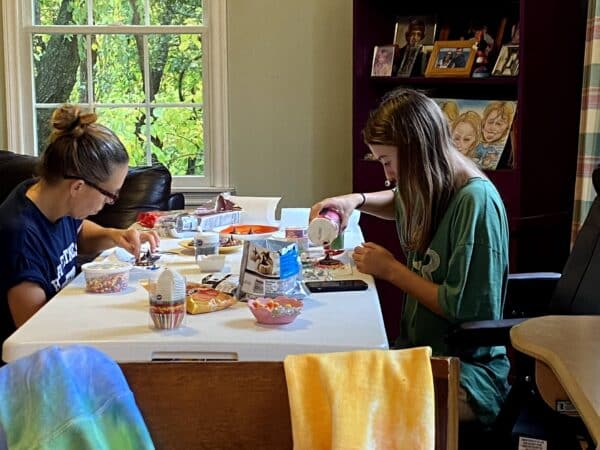
This is one of those get-you-in-the-spirit kind of baking projects. Halloween just around the corner? Bedazzled chocolate witches’ hats and frighteningly cute cookie ghosts are just what you need. They’re more construction project than baking expedition, and perfect for the kiddos to help with. Little fingers can unwrap chocolate kisses, squeeze the gel, and place candies just so.
Even my no-longer-little kid enjoys decorating witch hats and cookie ghosts. I am one lucky mama 
No bake, no fail, no problem!
Sometimes, a no-bake baking expedition is all you can handle. Especially after a baking fail of epic proportions. Like, maybe, I was trying to create a version of my successful candy bar cookies — but instead with (and now I see the error of my thinking) mini Rolo candies and marshmallows.
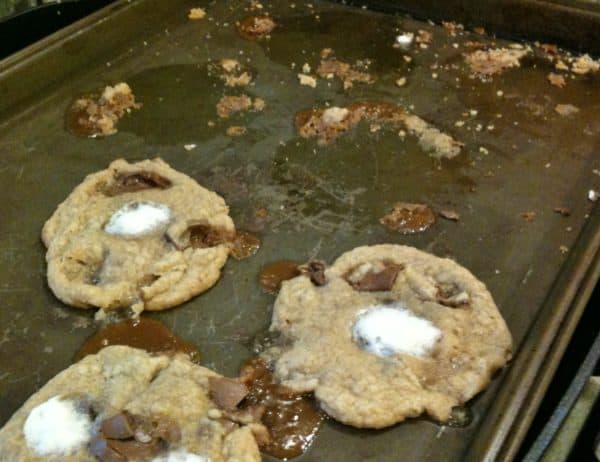
Every instinct (and sugar receptor in your body) may tell you that a cookie filled with marshmallows and Rolos will be incredible. However, they quickly lose their charm when you have to chisel them off the baking pan. A gooey, sticky, caramel mess! I nearly ruined three pans. Why didn’t I use the silicon baking mat that’s been in my cabinet for 5 years?! Or consider parchment paper?? (the suggestion my Facebook friends practically shouted in unison when I shared my failure online.)
Yes, when you need the win, no-bake treats are the way to go.
No-bake Halloween treats and homeschooling? Sure.
You know what else is a win? When you turn this fun Halloween project into a homeschooling activity for young students. In addition to allowing practice with fine motor skills and creativity, it incorporates themes like:
- health (the importance of clean hands when handling food)
- math (identify, count, and sort colors)
- visual arts (discuss patterns and design ideas, what colors do you think of when you think of Halloween?)
- social studies (when/how was Halloween invented?)
- science (how does chocolate melt in the microwave?)
- And, of course, snack time, because it’s a Halloween craft project that you can actually eat!
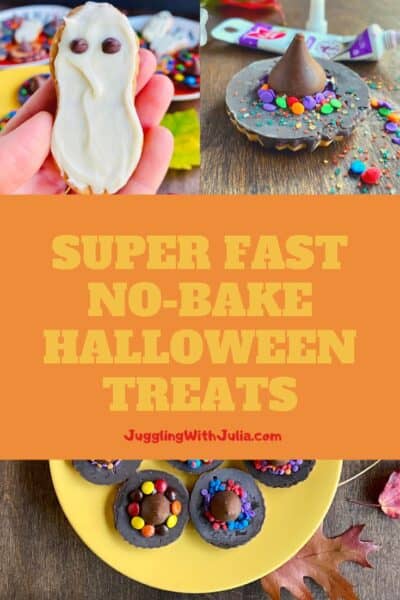

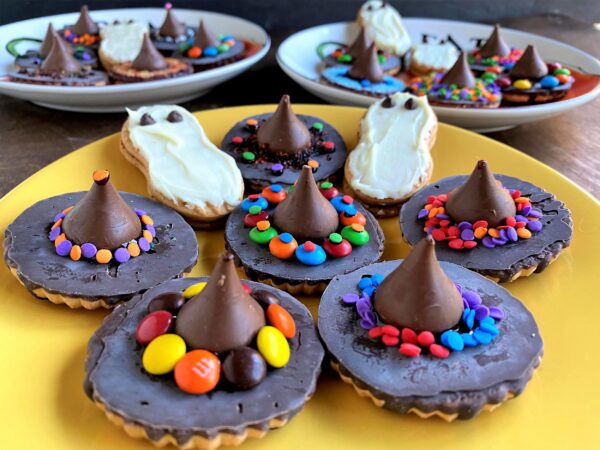
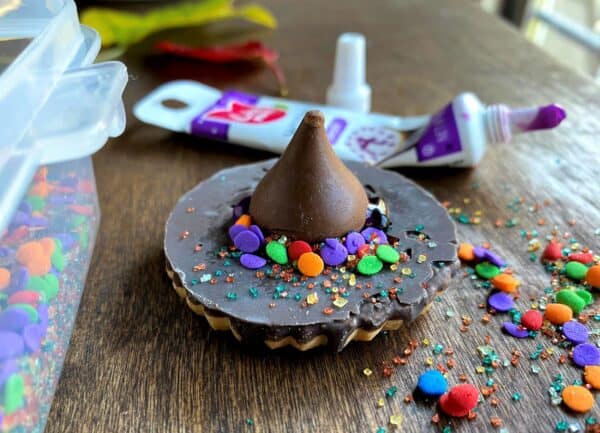
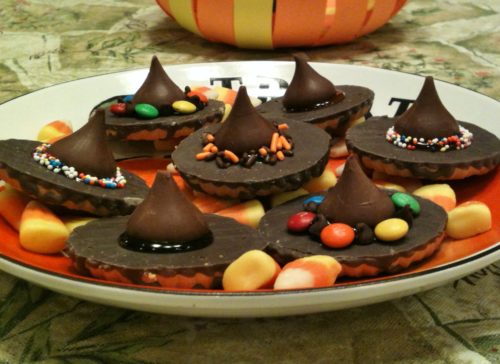
No-Bake Halloween Treats: Chocolate Witch Hats and Ghosts
Brightly bedazzled chocolate witch hats and ghost cookies your kiddos will love to make. The easiest last-minute no-bake Halloween treat ever!
Ingredients
Chocolate Witch Hats
- 1 dozen fudge-striped cookies like Keebler
- 12 each chocolate kiss candies
- edible writing gel such as CakeMate
- miniature M&M's
- assorted sprinkles
White Chocolate Ghosts
- 1 dozen peanut butter sandwich cookies like Nabisco Nutter Butter
- ½ cup white chocolate chips
- ½ tbsp shortening
- miniature chocolate chips (for eyes)
Instructions
Chocolate Witch Hats
-
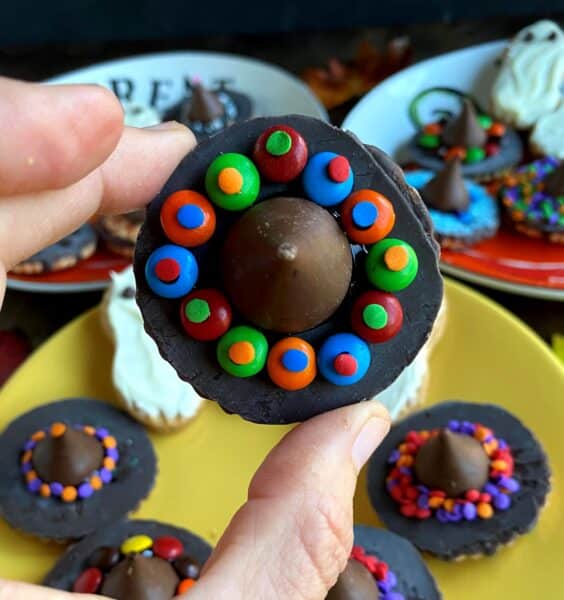
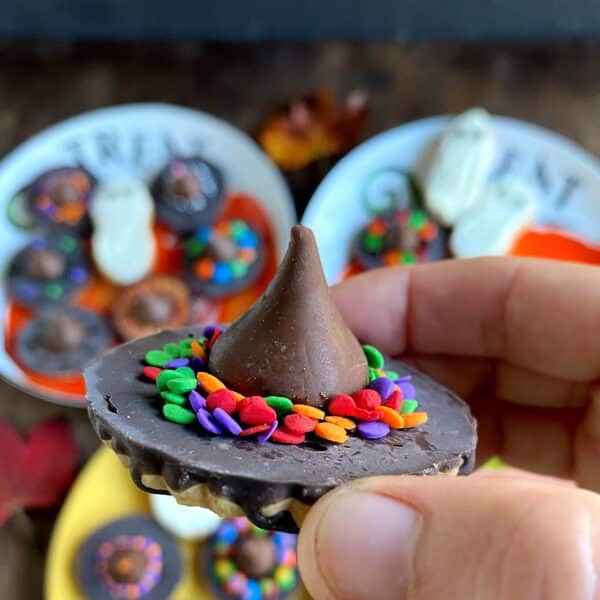
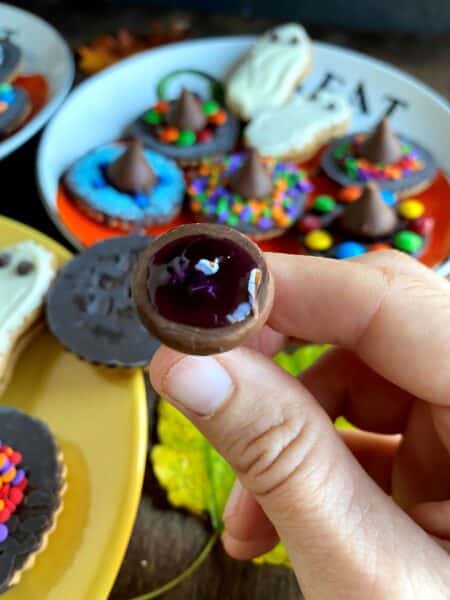
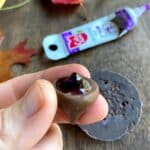
Arrange the cookies (fudge stripes facing down) on a large cutting board or baking pan. Unwrap 12 chocolate kisses and toss the wrappers.
-
Take a chocolate kiss, and squeeze a dollop of writing gel onto the bottom of it. Place the kiss right-side up on the center of a cookie, pressing down slightly so there is a ring of gel showing at the base of the chocolate kiss. Repeat this for the remaining cookies.
-
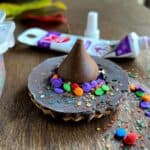
Decorate with assorted sprinkles and miniature candy pieces, making sure to cover all the exposed gel. Set aside and continue until all 12 cookies are decorated. Step back and admire your genius and creativity!
-
Store for up to a week in an airtight container. Be careful not to stack the cookies on top of each other or to overstuff the container.

White Chocolate Ghosts
-
Put the white chocolate chips and shortening in a microwave-safe bowl. Microwave for 15 seconds at 70% power. Stir. If not fully melted, do a second interval of 15 seconds at 70% power, then stir again. Continue these intervals until fully melted and creamy, being careful not to over-heat the mixture.
*Note: microwave strengths vary widely. In my kitchen, it barely took two intervals for the mixture to be fully melted and ready to spread on the cookies. Adjust timing based on your microwave.
-
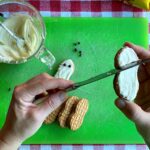
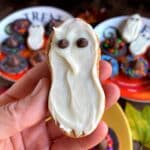
Working steadily while the chocolate is warm, use a knife or small spatula to spread the melted chocolate over the top of a cookie. Place two miniature chocolate chips for eyes, then set aside. Continue with each cookie until all 12 are done.
-
Once the chocolate has hardened, you may enjoy them immediately or store in an airtight container for up to one week.
(Post updated October 2020; below are original photos from 2012)


These are such a cute idea for Halloween! My granddaughter would love these!
Thank you, Marcia! My daughter and I had a good time with those witch hats and the monster yogurt cups especially 🙂
How do you keep the writing gel from falling through the hole of the cookie?
The cookies I bought were knock-offs of Keebler fudge stripes and the holes were small. You can try only putting the gel around the edges of the kiss so not much, if any, goes thru the hole. Let me know if that works!
OMG you are a life saver making these ASAP!
Wonderful!!!
Nutter Butter Ghosts-done. Witches Hats-done. I even told a grandma about them in the cookie aisle at the grocery store. 🙂
Awesome!! Easy peasy, right??
We made the Nutter Butter ghosts yesterday. They were so cute! I used canned white frosting to save a step. I should say “the kids used frosting”. I plopped the cookies, a pile of butter knives, the frosting, and the mini chips onto the kitchen table, showed the crew how to make one, and voila! 15 minutes later, they had a plate of ghosts for Halloween! Fun & easy for all ages!!
Perfect!!
These are great! Thanks for sharing.
Thanks, Selene!!!
The cutest Halloween treats I’ve ever seen…..how clever you are.
Jackie
Thank you, Aunt Jackie 🙂
I had a similar junior mint issue. Delicious but a visual disaster. Yay parchment paper!
Haha! I can see how that would happen!! I bet they tasted great 🙂
Super cute cookies! How do you like your new mixer? I’ve been dying to get one :-)!!
Thank you!! Love the mixer. Replaces my 40+ year old one that was my grandmothers!! Hope you get one for yourself soon.